Serverless Deployment of a ToDo application
This project involves developing a ToDo application with a serverless architecture

This project involves developing a ToDo application with a Serverless architecture, utilizing AWS Lambda for backend functionality, AWS API Gateway for RESTful API interfaces, and AWS RDS for data persistence.
The Serverless Framework will be used to streamline the deployment and management of the serverless components. This project aims to provide learners with practical experience in building and deploying serverless applications in a cloud environment.
Let's Get Started 🧑💻🚀
Setup Serverless Account
What is serverless?
Serverless is a Framework. The Serverless Framework pioneered serverless architecture on AWS, a transformative approach to building applications on cloud infrastructure that auto-scales, incurs no charges when idle, and typically demands minimal maintenance. Today, it continues to be the leading developer tool for deploying serverless architectures.
Serverless is AWS Technology Partner.
Refer this documentation for more details: https://www.serverless.com/framework/docs
Signup/Login into the Serverless
After login, you will see such screen:

To run serverless we need to install it in our machine. As serverless works on Node.js we need to install it first.
For Ubuntu machine run below command to install Node.js version 18:
sudo apt-get update && curl -sL https://deb.nodesource.com/setup_18.x | sudo bash - && sudo apt install -y nodejs
I am going to launch an EC2 instance and in that I will intall everything. [You can use your local machine for the same]
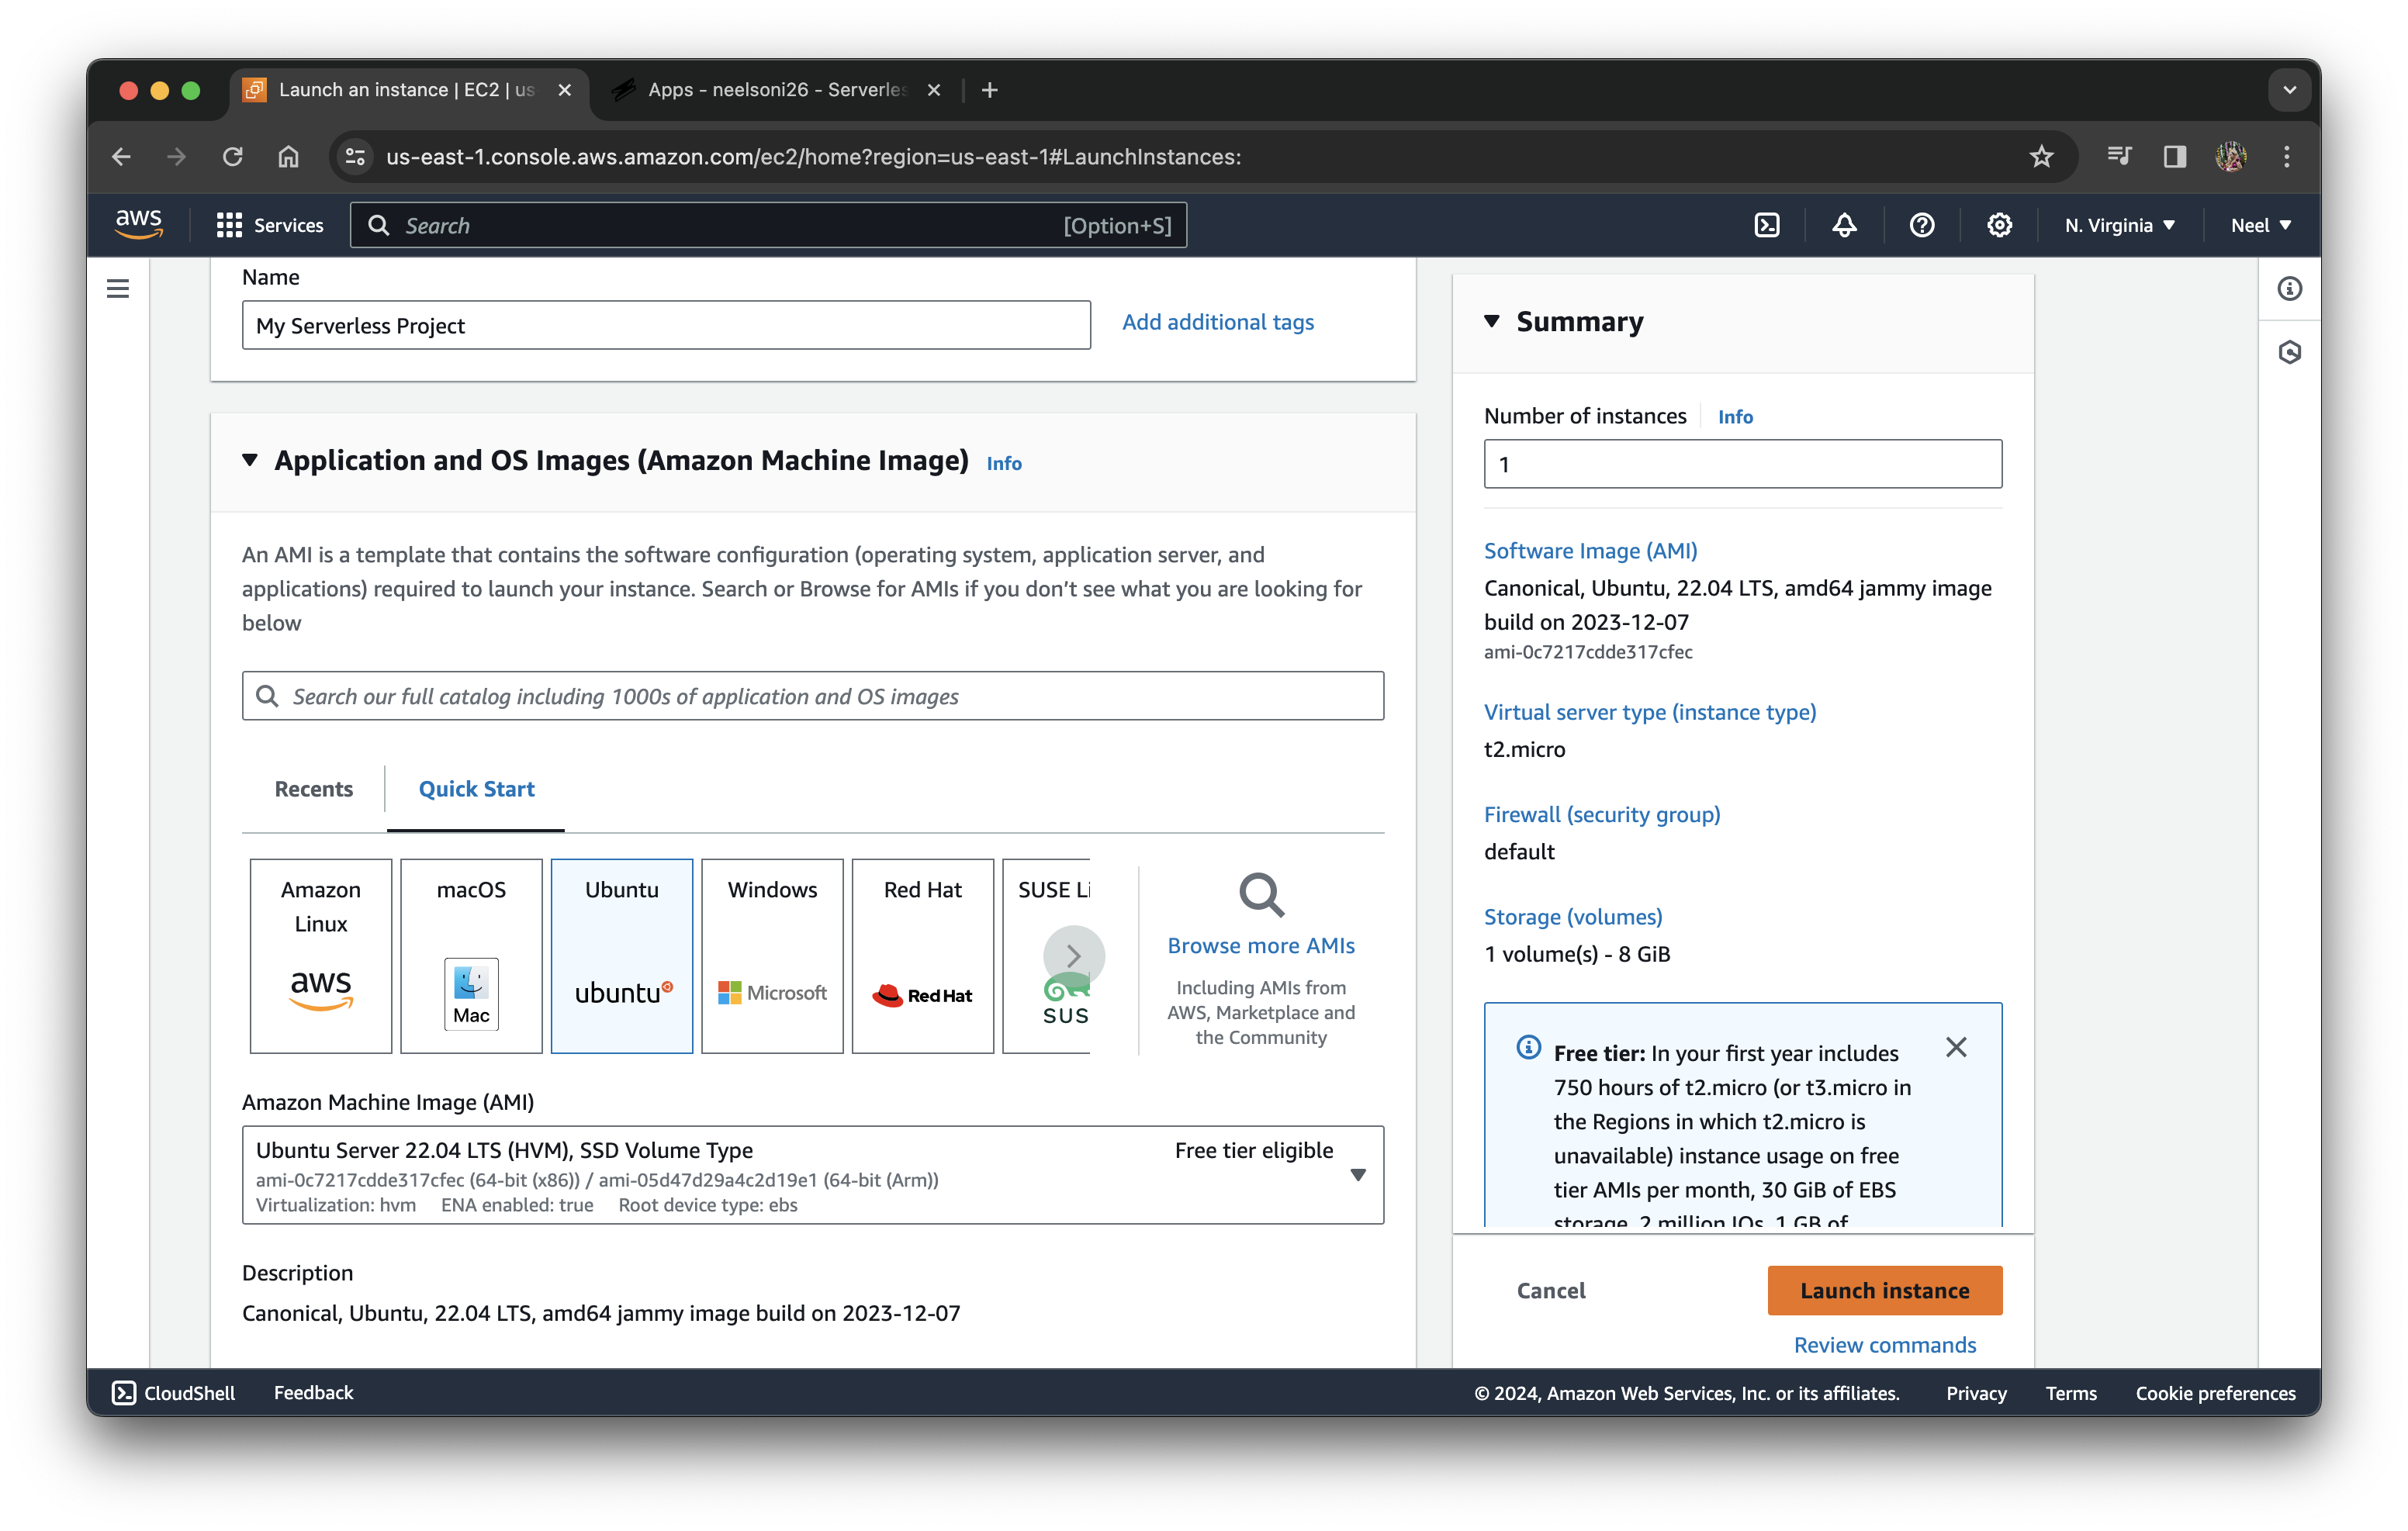
Connect to the instance, install Node.js and then install npm. You may need to reboot your system.
Now, To install serverless framework run command:
sudo npm install -g serverless
npm(node package manager) will install serverless globally(-g).
Next, install AWS cli. This will help serverless to communicate with AWS.
sudo apt-get install -y awscli
You also need to configure it. You can find steps here: https://neel-soni.hashnode.dev/iam-programmatic-access-and-aws-cli
Here, I created a user with admin acess.
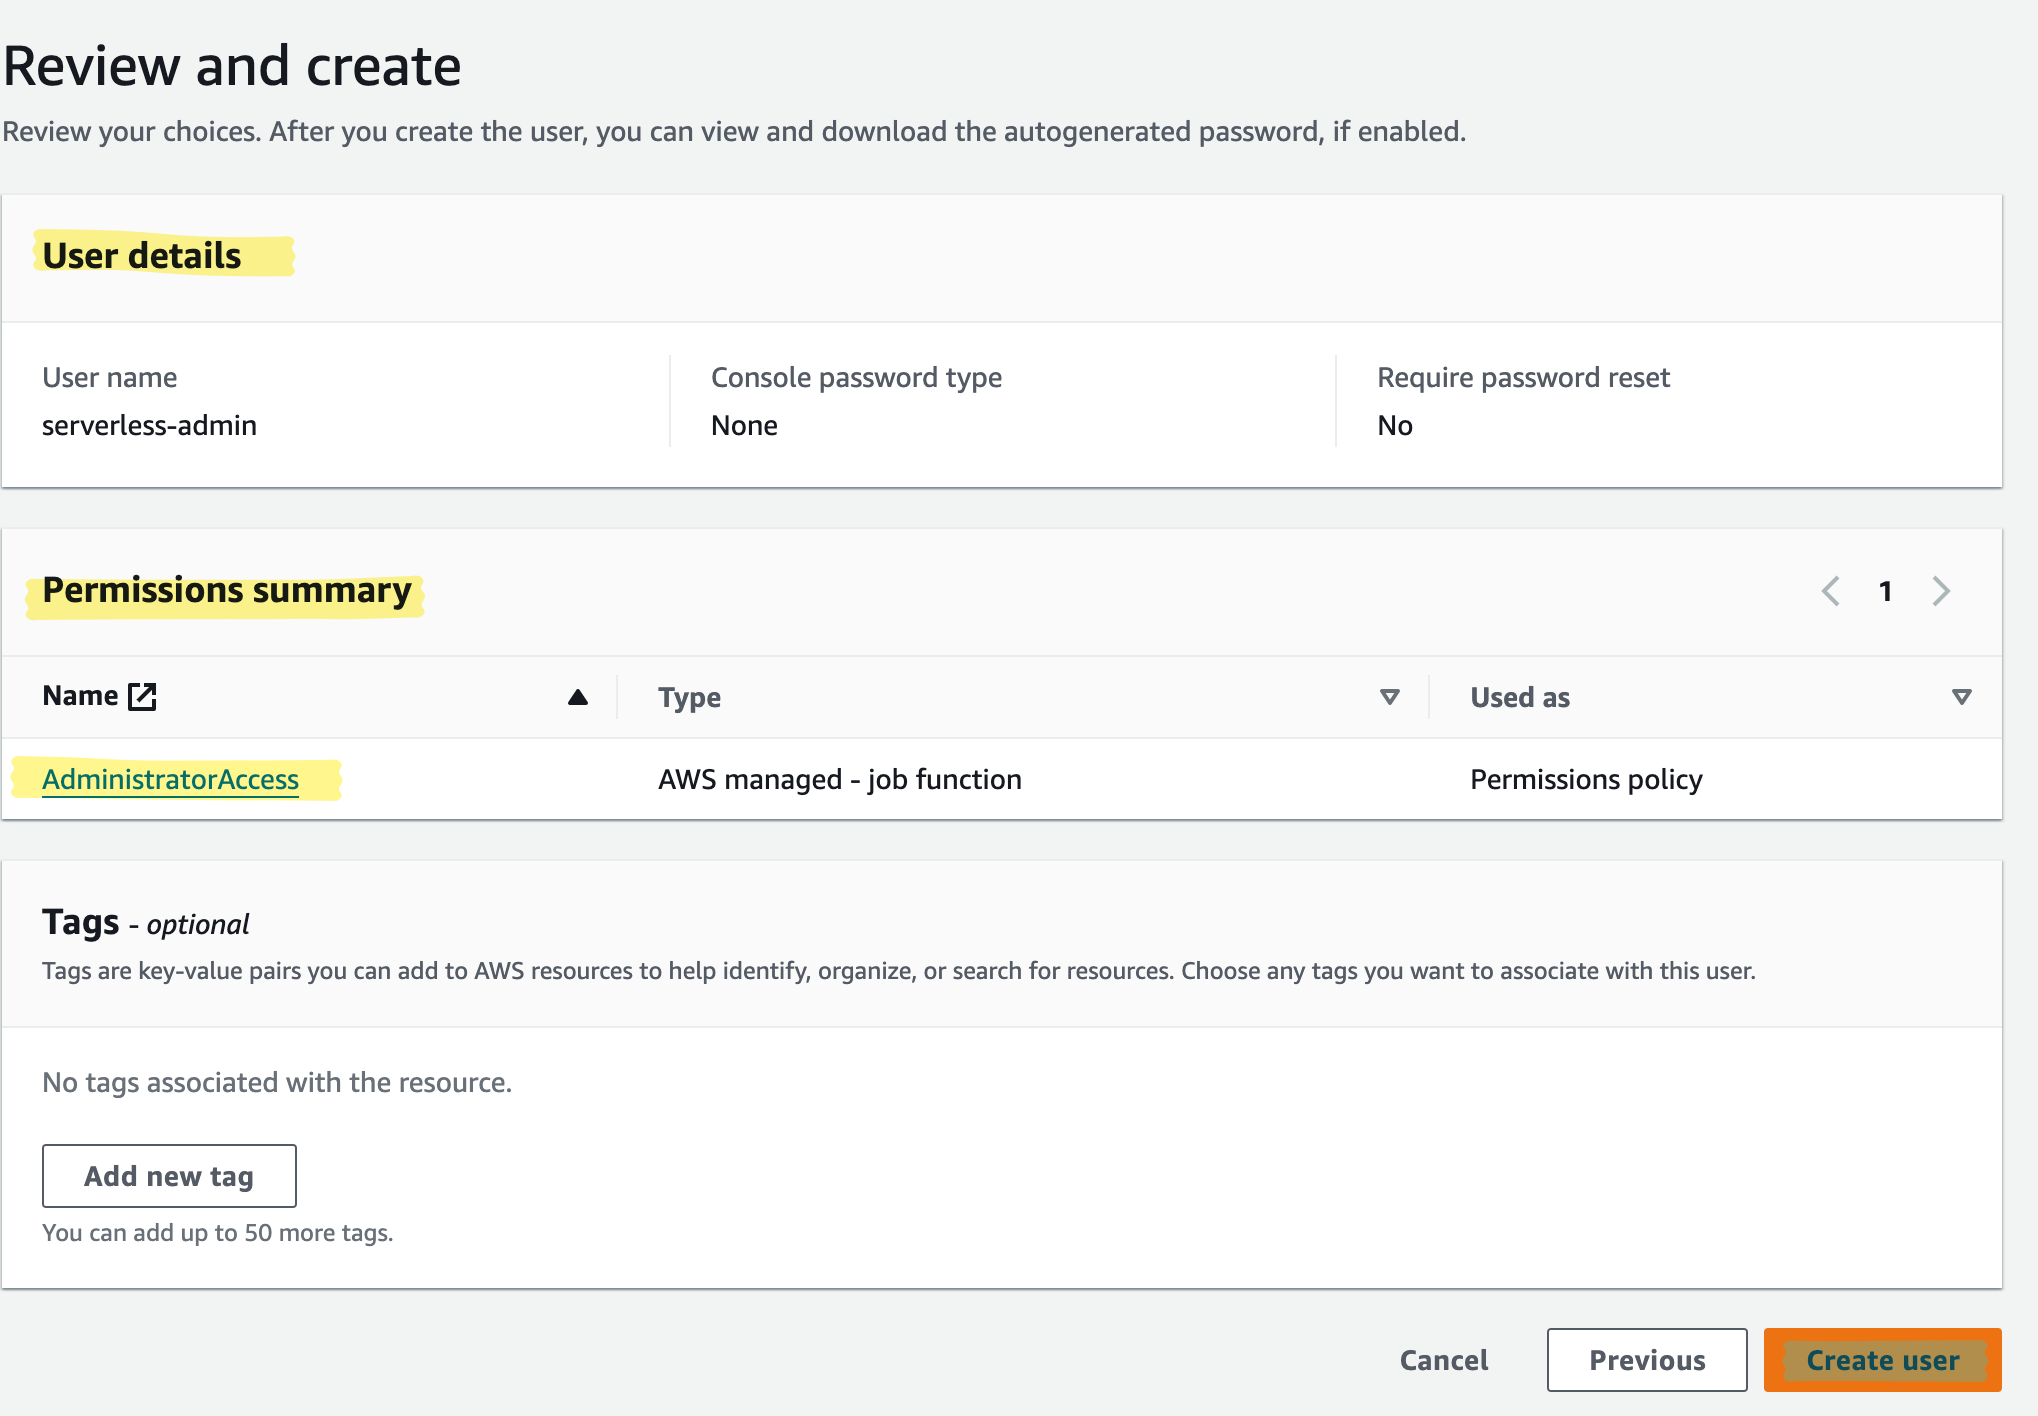
aws configure
Enter AWS Access Key ID and AWS Secret Access Key.
Serverless Log in CLI
Login to your serverless account with cli in order to deploy the applications, use command:
serverless login
Clone Project
Let's Start The Project.
I have a project of CRUD (Create, Read, Update, Delete) for a ToDo items. Check out this GitHub repository: https://github.com/neelsoni26/serverless-taskmaster-aws-app
Clone this repository. Modify the serverless.yml file;
In the first line change the org value as your organizational name.
Second change is in the iamRoleStatement > Resource > arn:aws:dynamodb:us-east-1:
<Your user account id>:table/KaamKaro
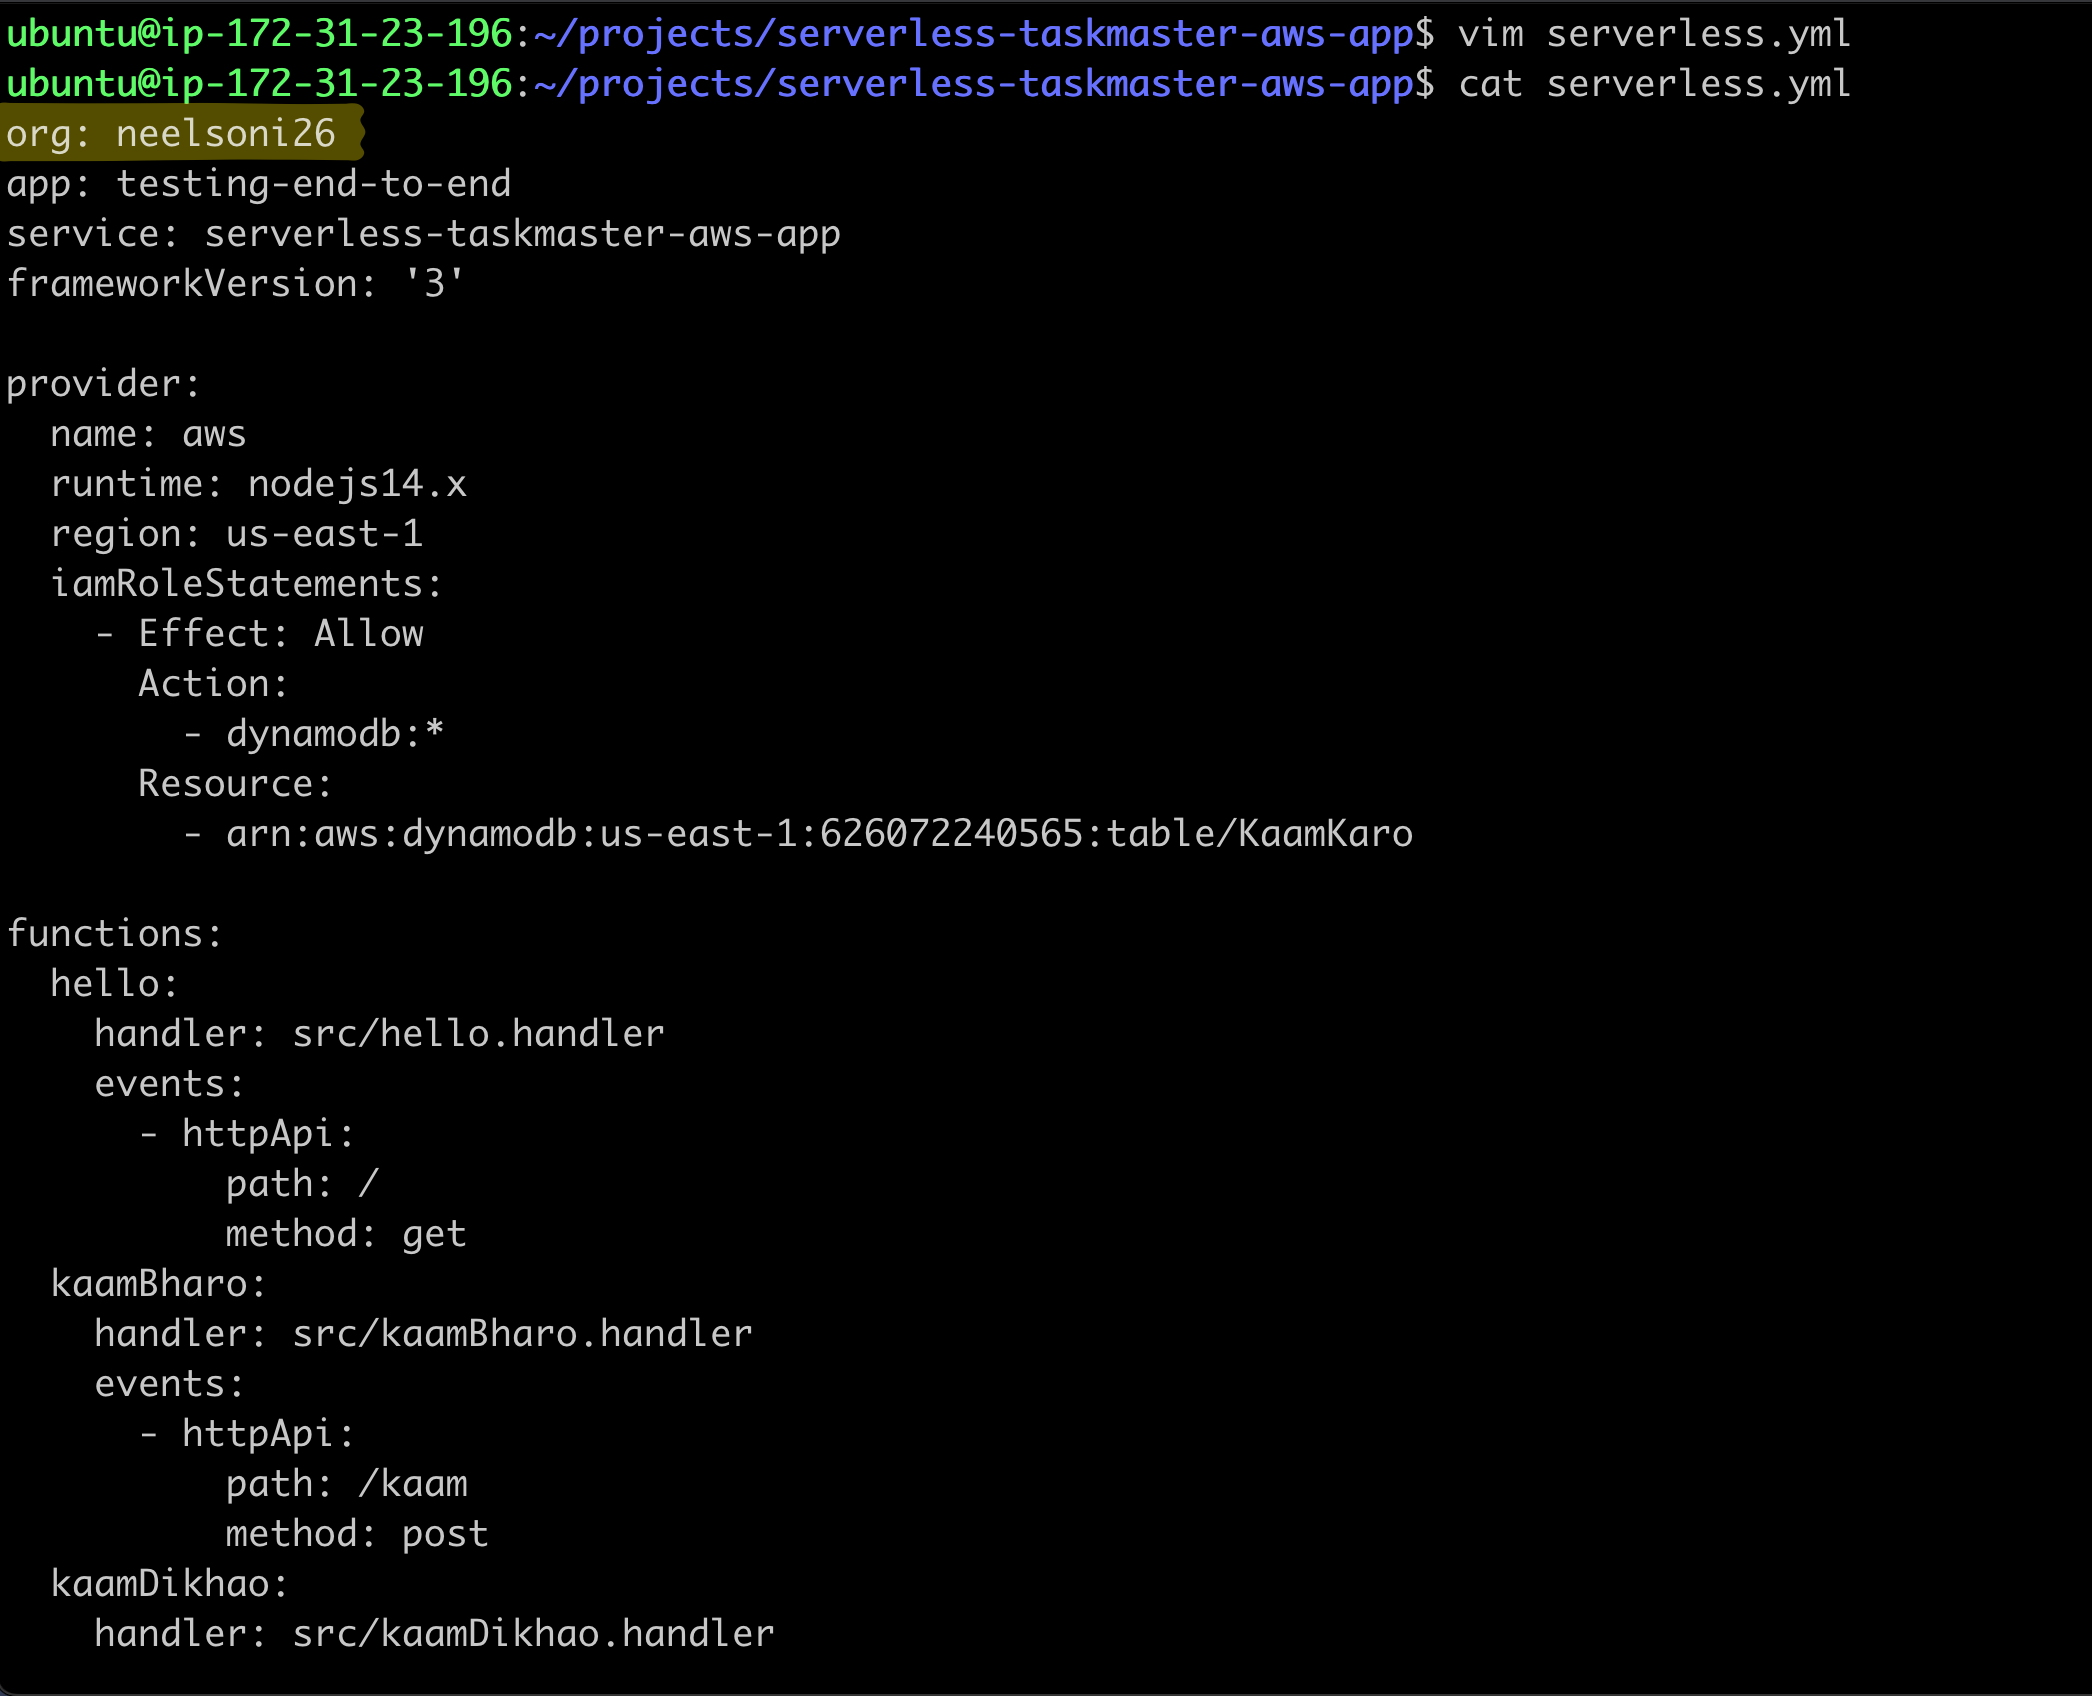
Understand the serverless file:
org is the organization name.
app is the application name.
service is the service name.
framework version is the serverless version that is going to be used to run this app.
provider is where all your (cloud and app)provider's details will be specified.
name: name of the cloud provider which is in our case aws.
runtime: on which background your app will run such as nodejs/python etc. with the version specified.
region: aws region where your application should deploy.
iamRoleStatements: Here, IAM roles will be specified.
Effect: permit the action.
Action: specify the list of actions. Like in our case we have allow every action for dynamodb with the *.
Resources: You can add ARN of the resource, but if you do not have any then do not write.
resources:
Resources: list the resources that you want to create.
You can refer to https://docs.aws.amazon.com/AWSCloudFormation/latest/UserGuide/aws-resource-dynamodb-table.html
functions: specify lambda functions as per your application.
name: name of the function.
handler: url [path] of the handler function (nodejs exported function) (ask app developer for more info).
events: events to be performed.
httpAPI: perform task when http request it gets.
path: path [url] of the event. (in our case when someone hit our ip address (with / ) it should execute the specific handler (src/hello.handler))
method: specify whether it is get, put or post (ask app developer for more info).
In our application, there are 4 fuctions which are
hello: just give hello msg.
kaamBharo: Create (insert data)
kaamDikhao: Show (display data)
kaamKhatamKaro: Delete (delete data)
That's it. This is our whole serverless.yml file.
Deploy Project
Now, let's deploy it.
First, install all dependency with command:
sudo npm install
Then to deploy the project enter command:
serverless --org=<your-org-name>
in my case it is neelsoni26, so serverless --org=neelsoni26

It will then create a project with the given name.
Next, it will ask you whether you want to deploy the project or not - Enter Yes.
It will start deploying.
The command serverless --org=<your-org-name> use first time while deploying, from the second time onward use command:
serverless deploy
After successfull deployment, it will give you the response with the URL of the each function(s) mentioned.
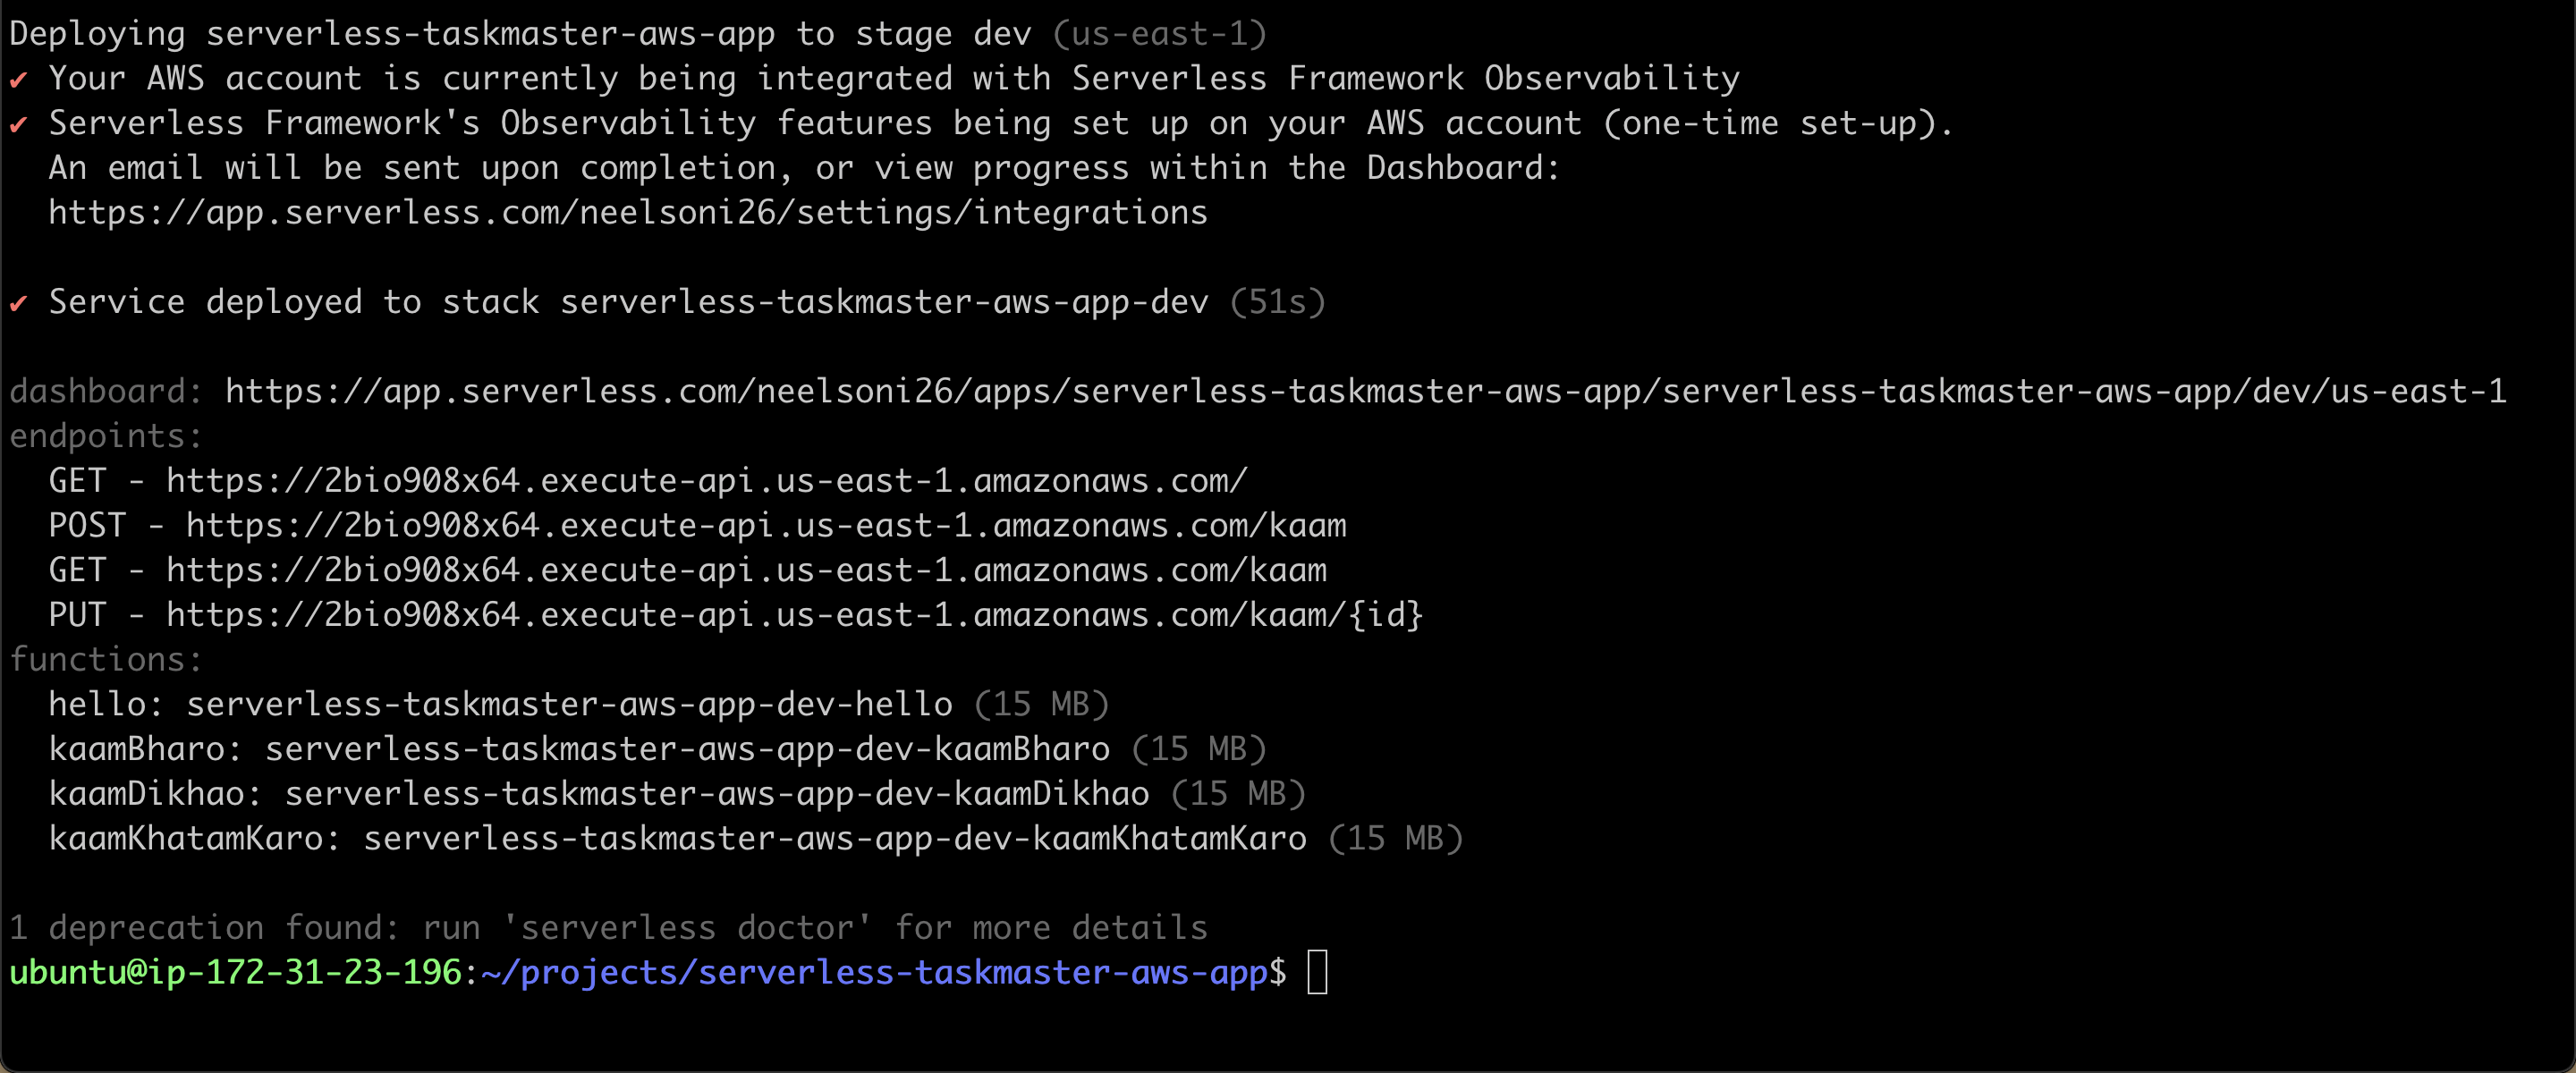
Copy hello link and check in browser.

If you see above message then congratulations 🎉 You have successfully deployed a working project on AWS with serverless.
CloudFormation Design
Let's check cloudformation design.
Go to AWS console > cloudformation > stacks then click on serverless-taskmaster-aws-app-dev

Click on update

Click on Edit in designer > View in designer
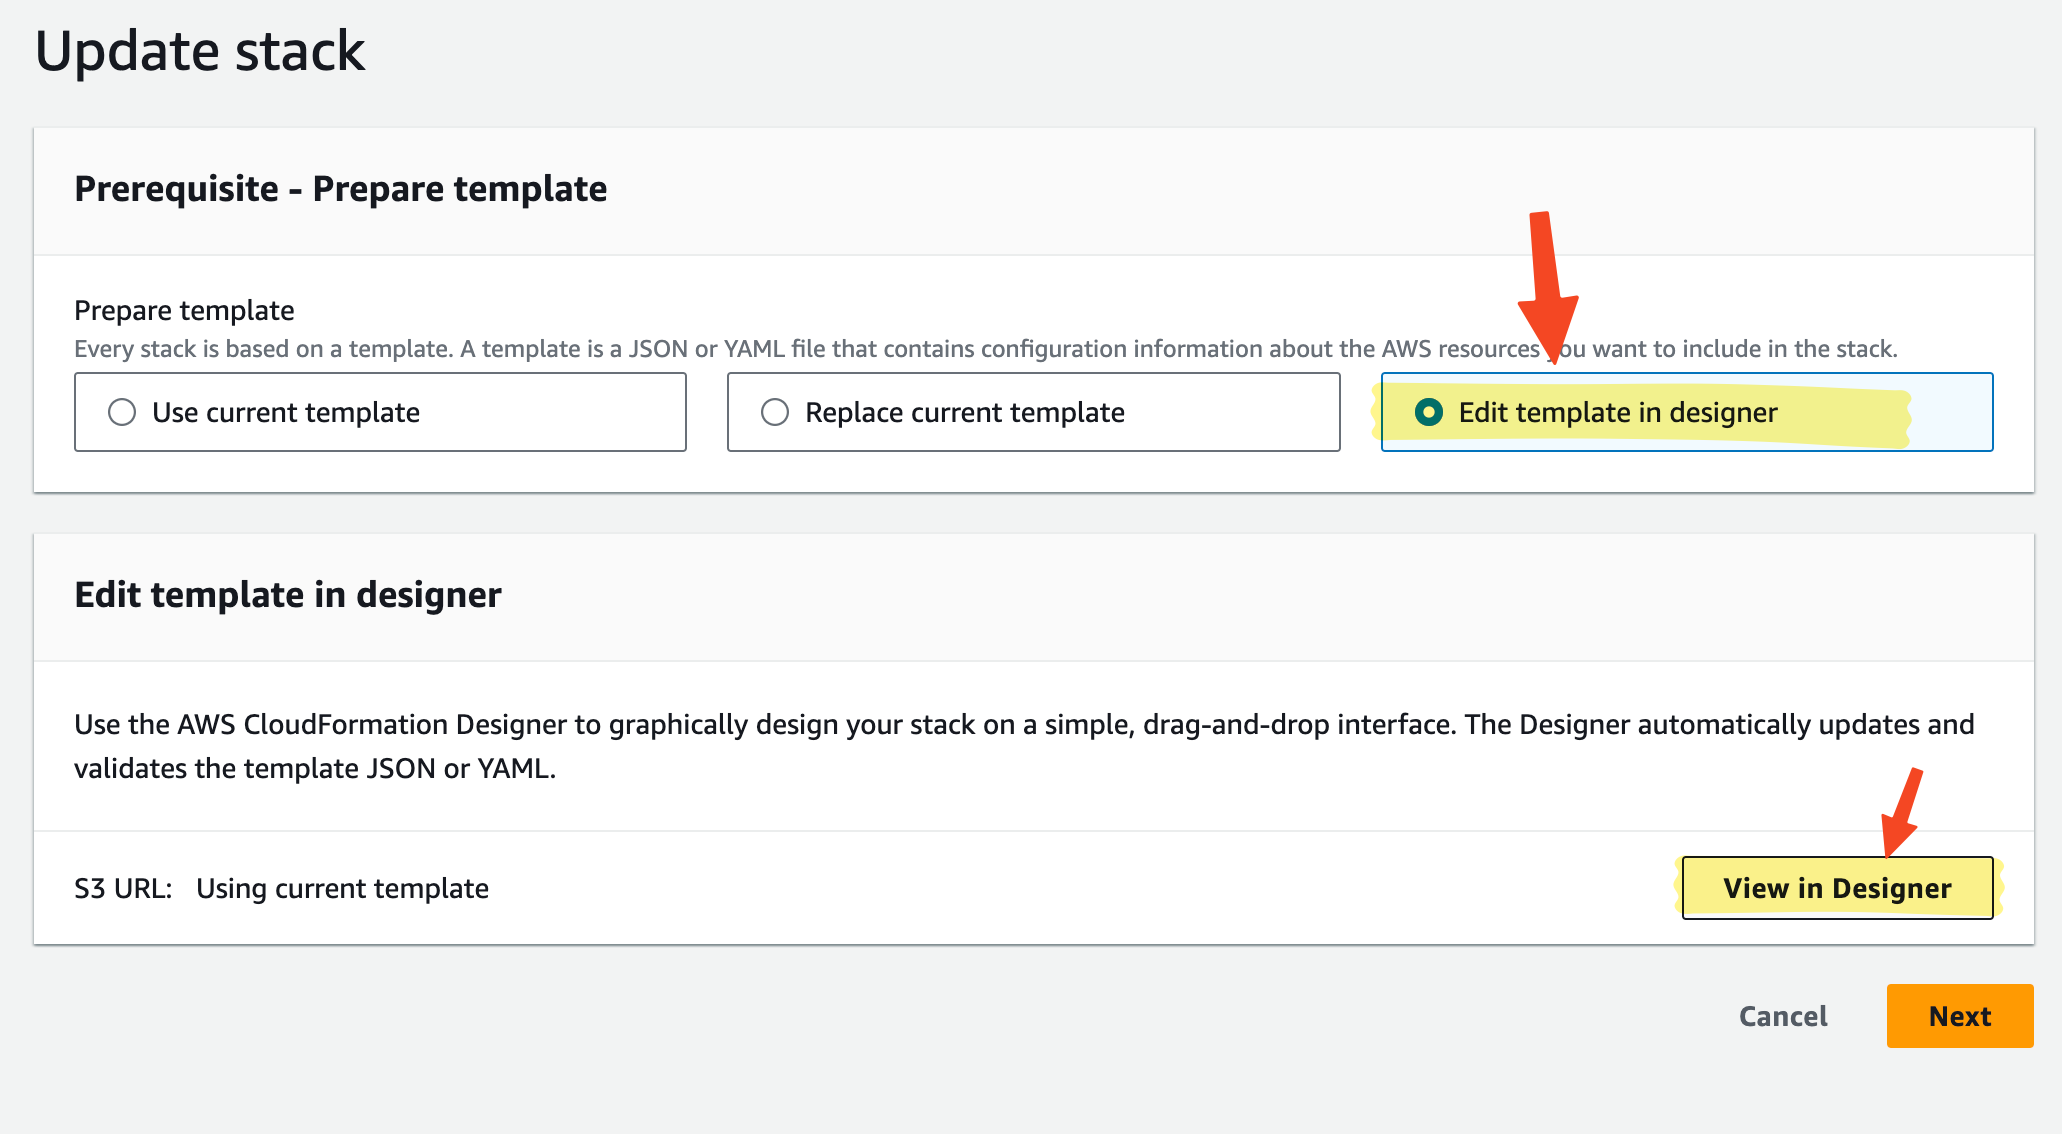

Whatever you see in the above image we created it with serverless.
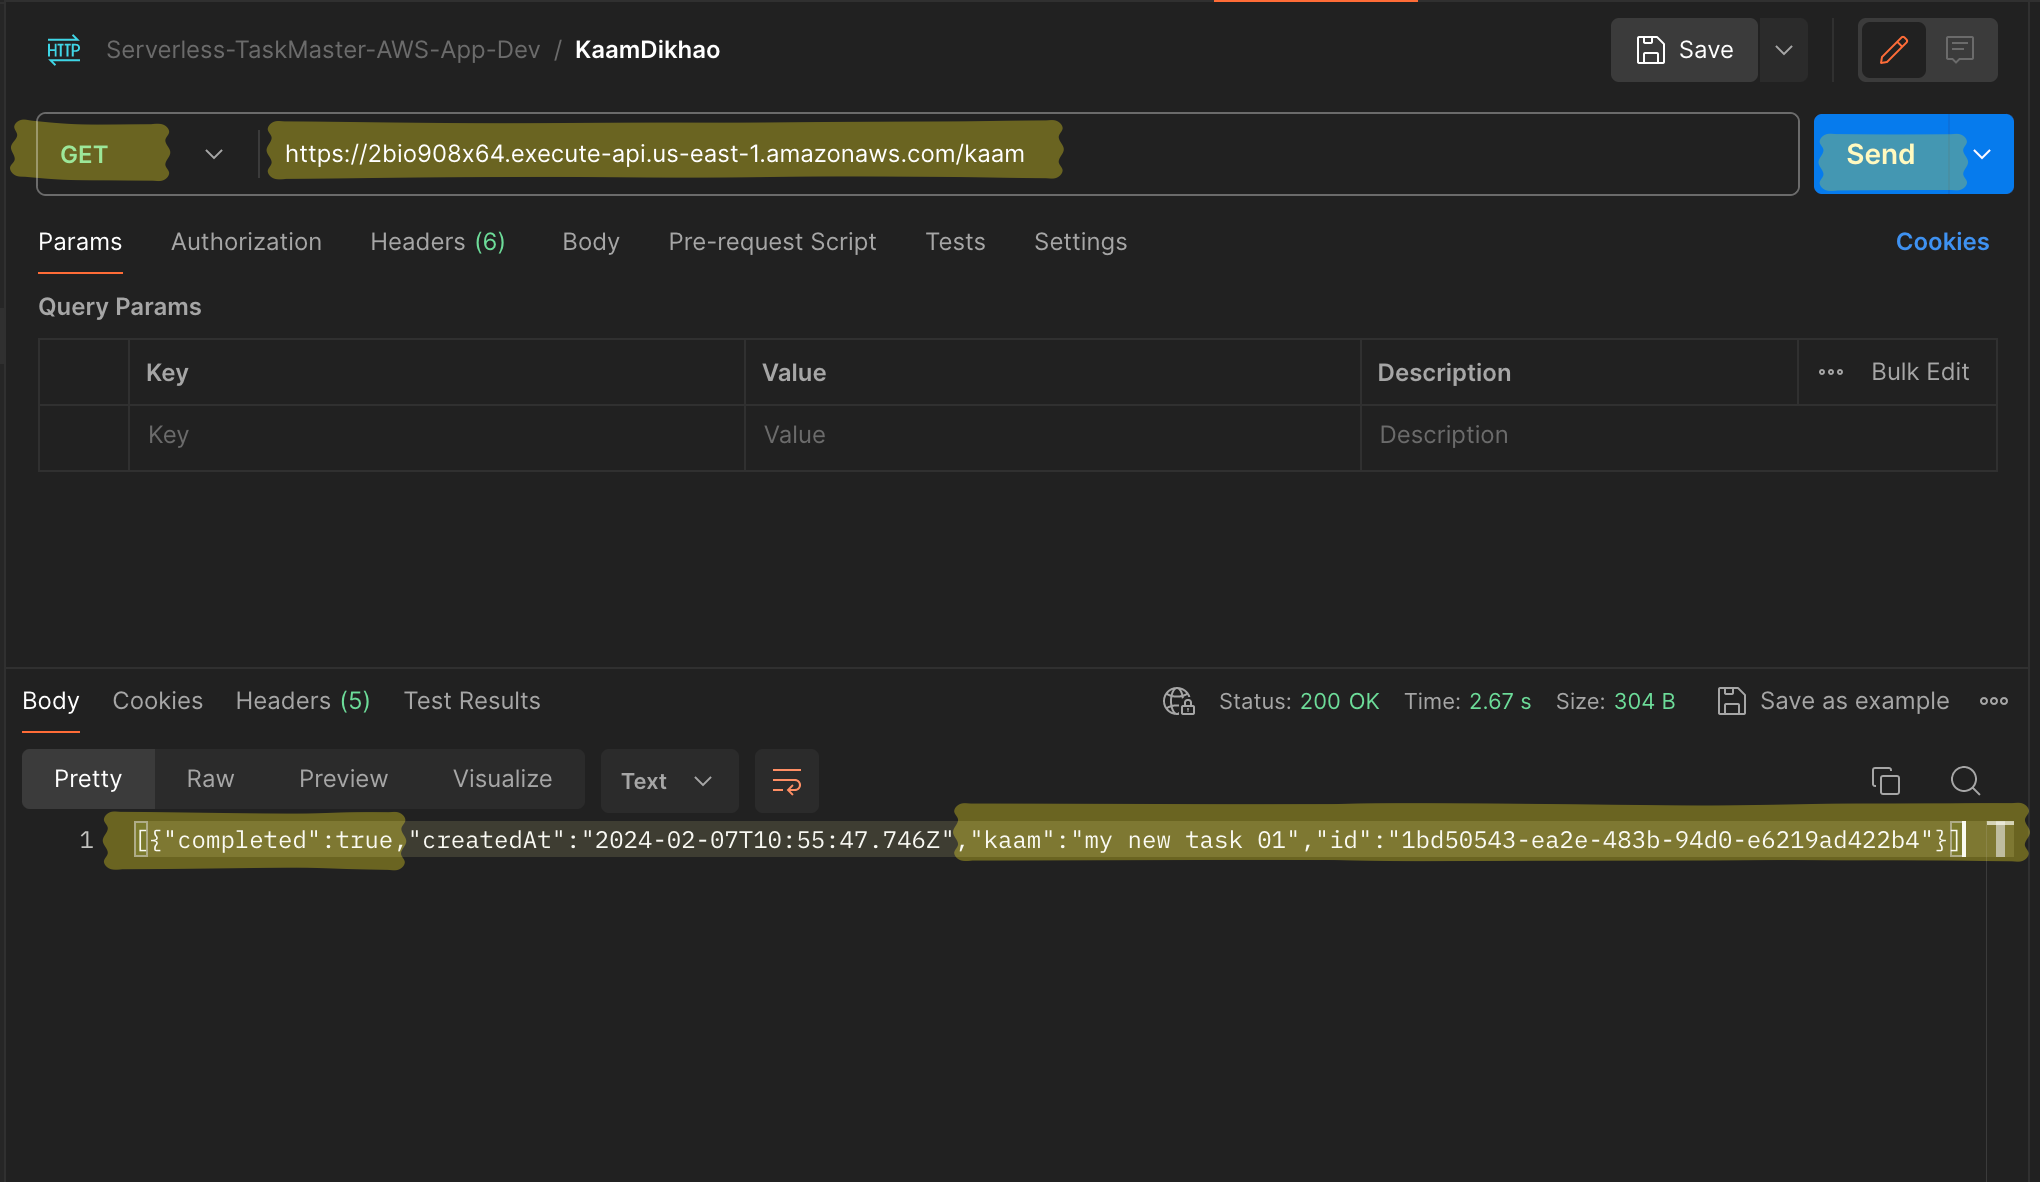
Postman API Testing
You can verify the links in Postman software for every function that we created.
Download postman software from here: https://www.postman.com/downloads/
Open the software Setup.
First, select GET requst and enter hello url and hit send button.
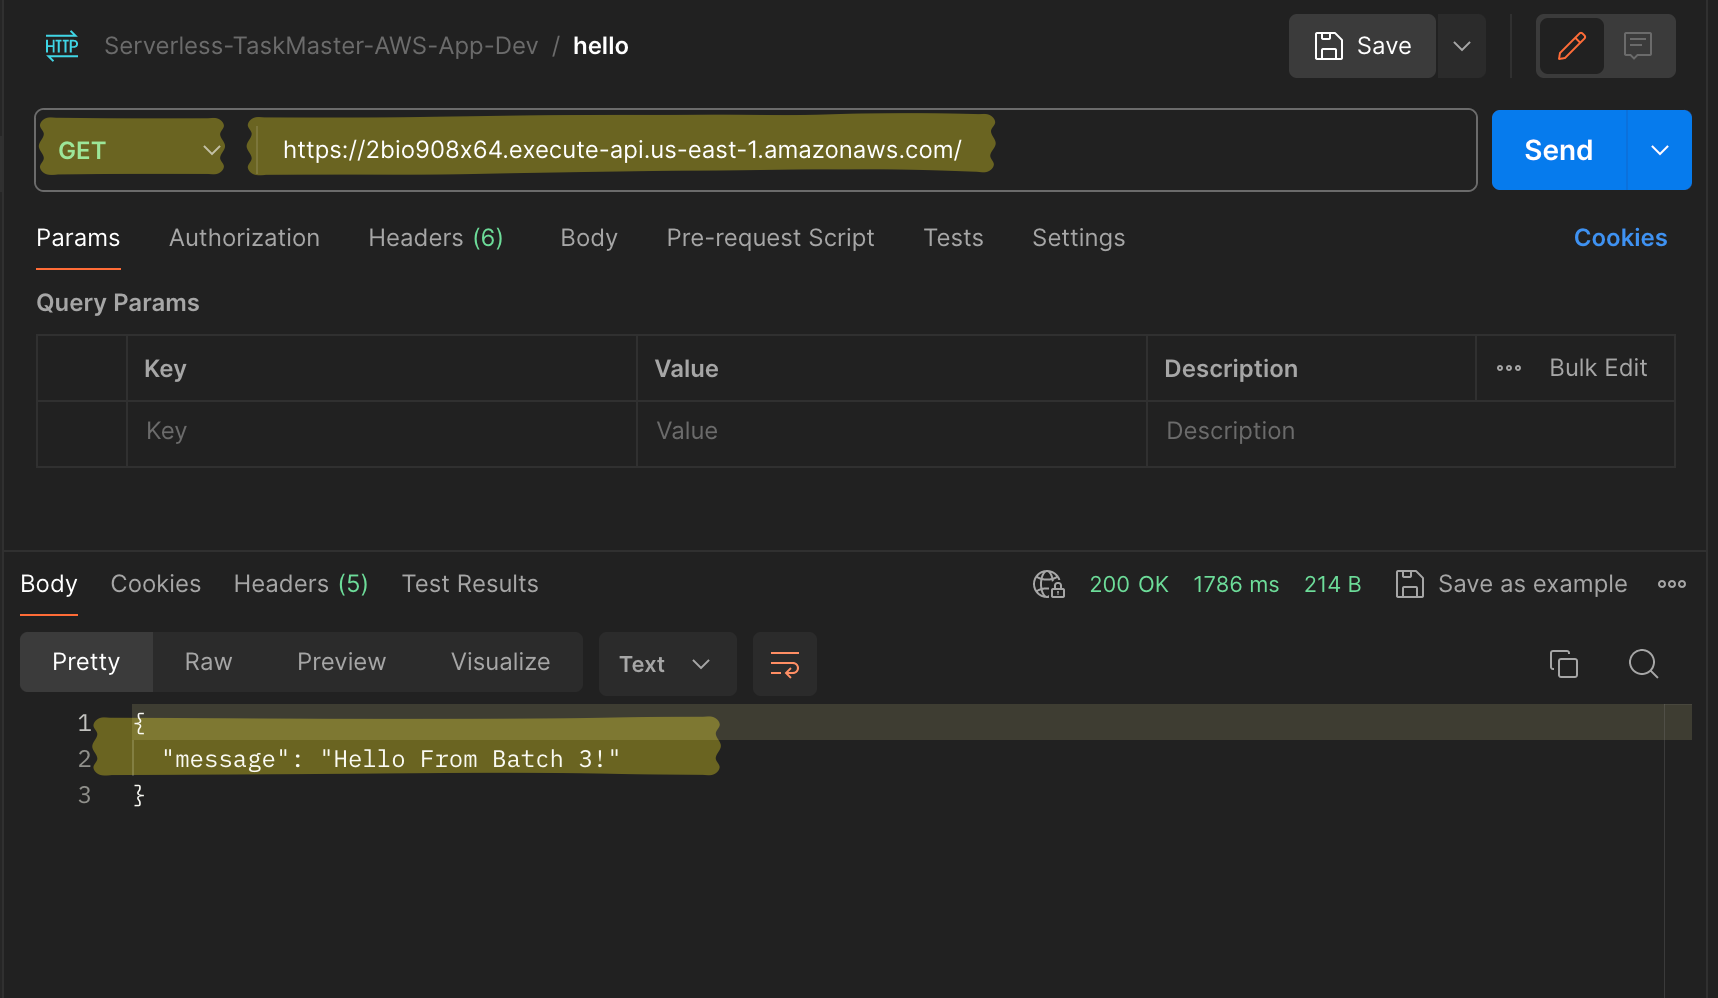
Verify the response.
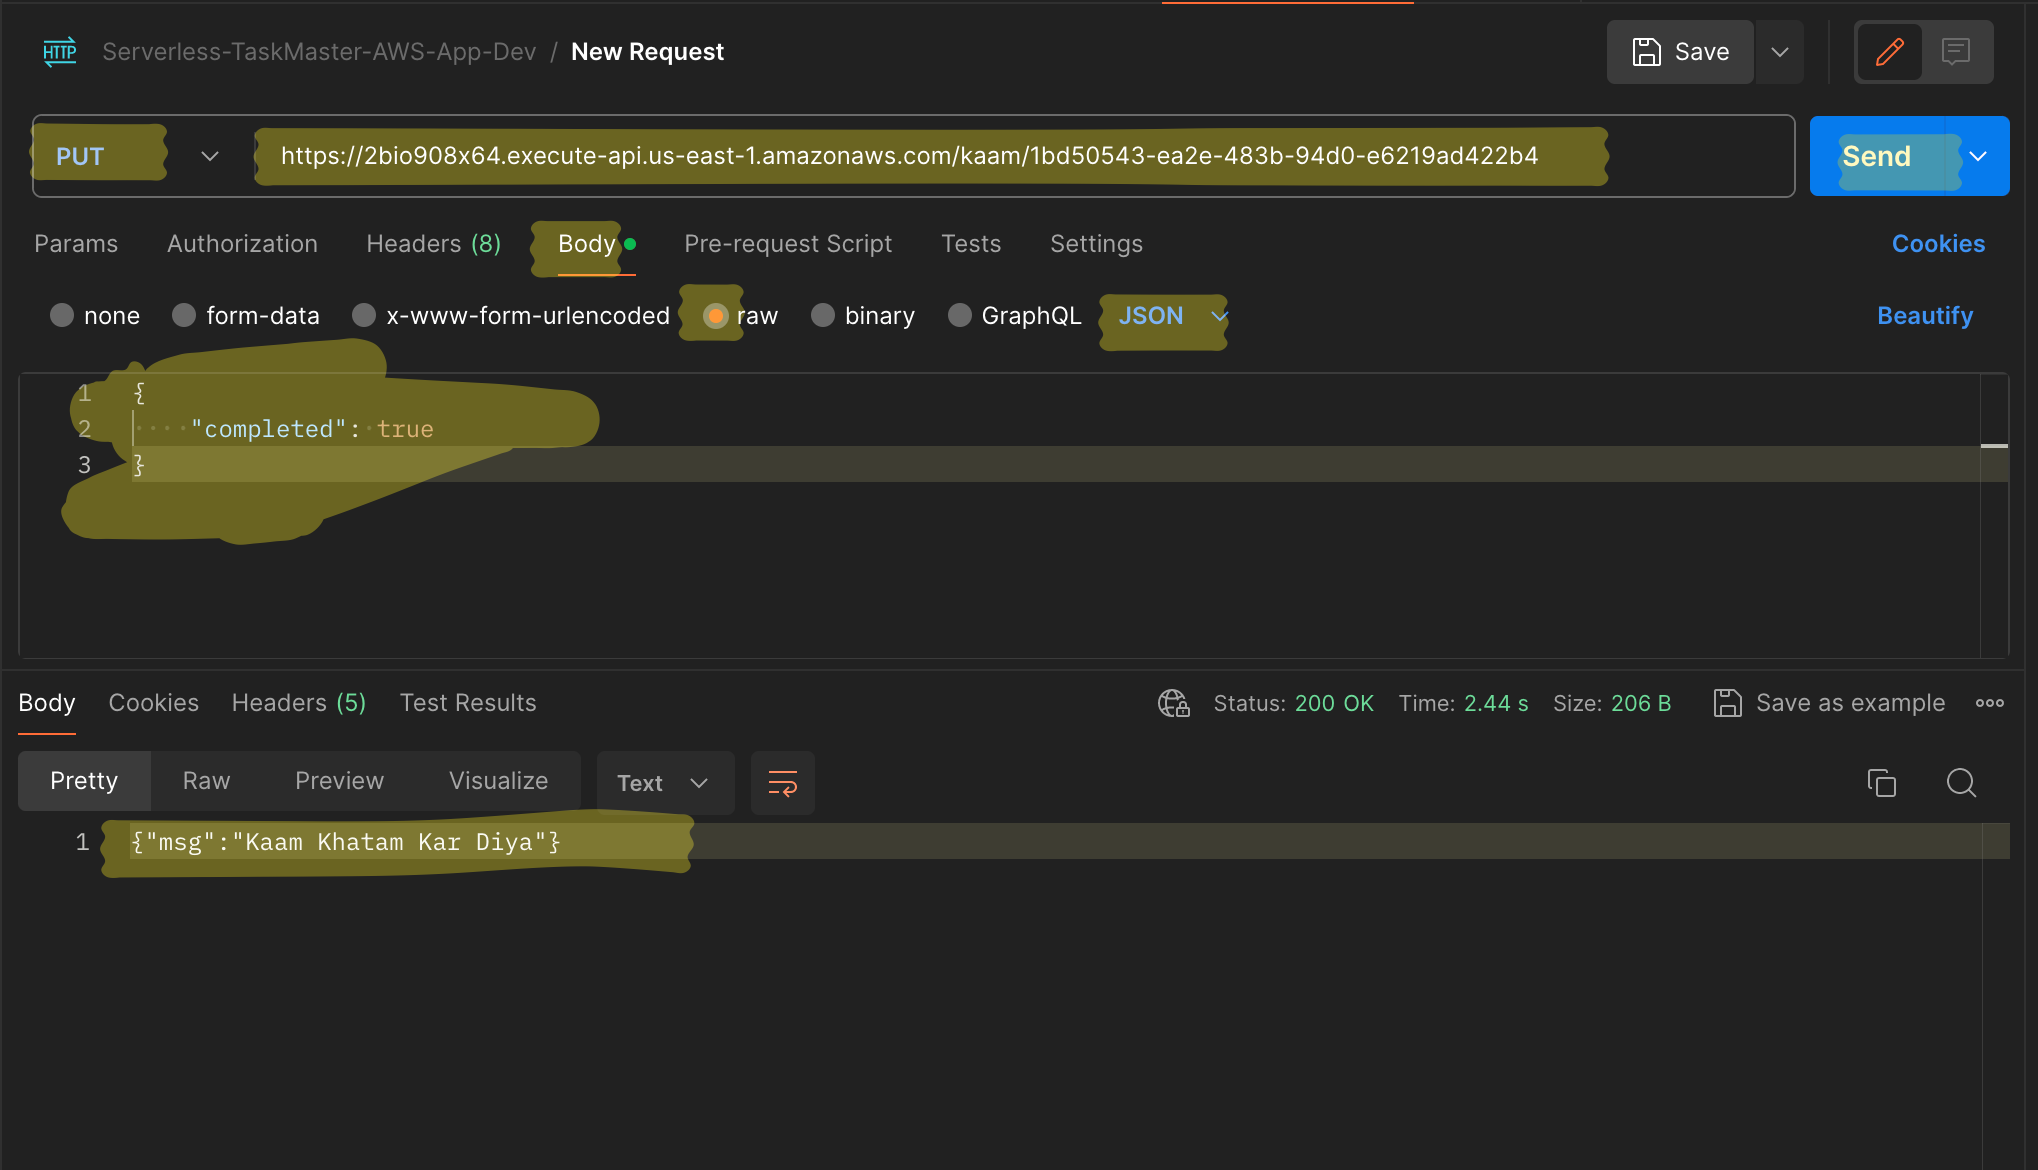
Second, select POST, enter url, enter body data and hit send. Then verify the response.
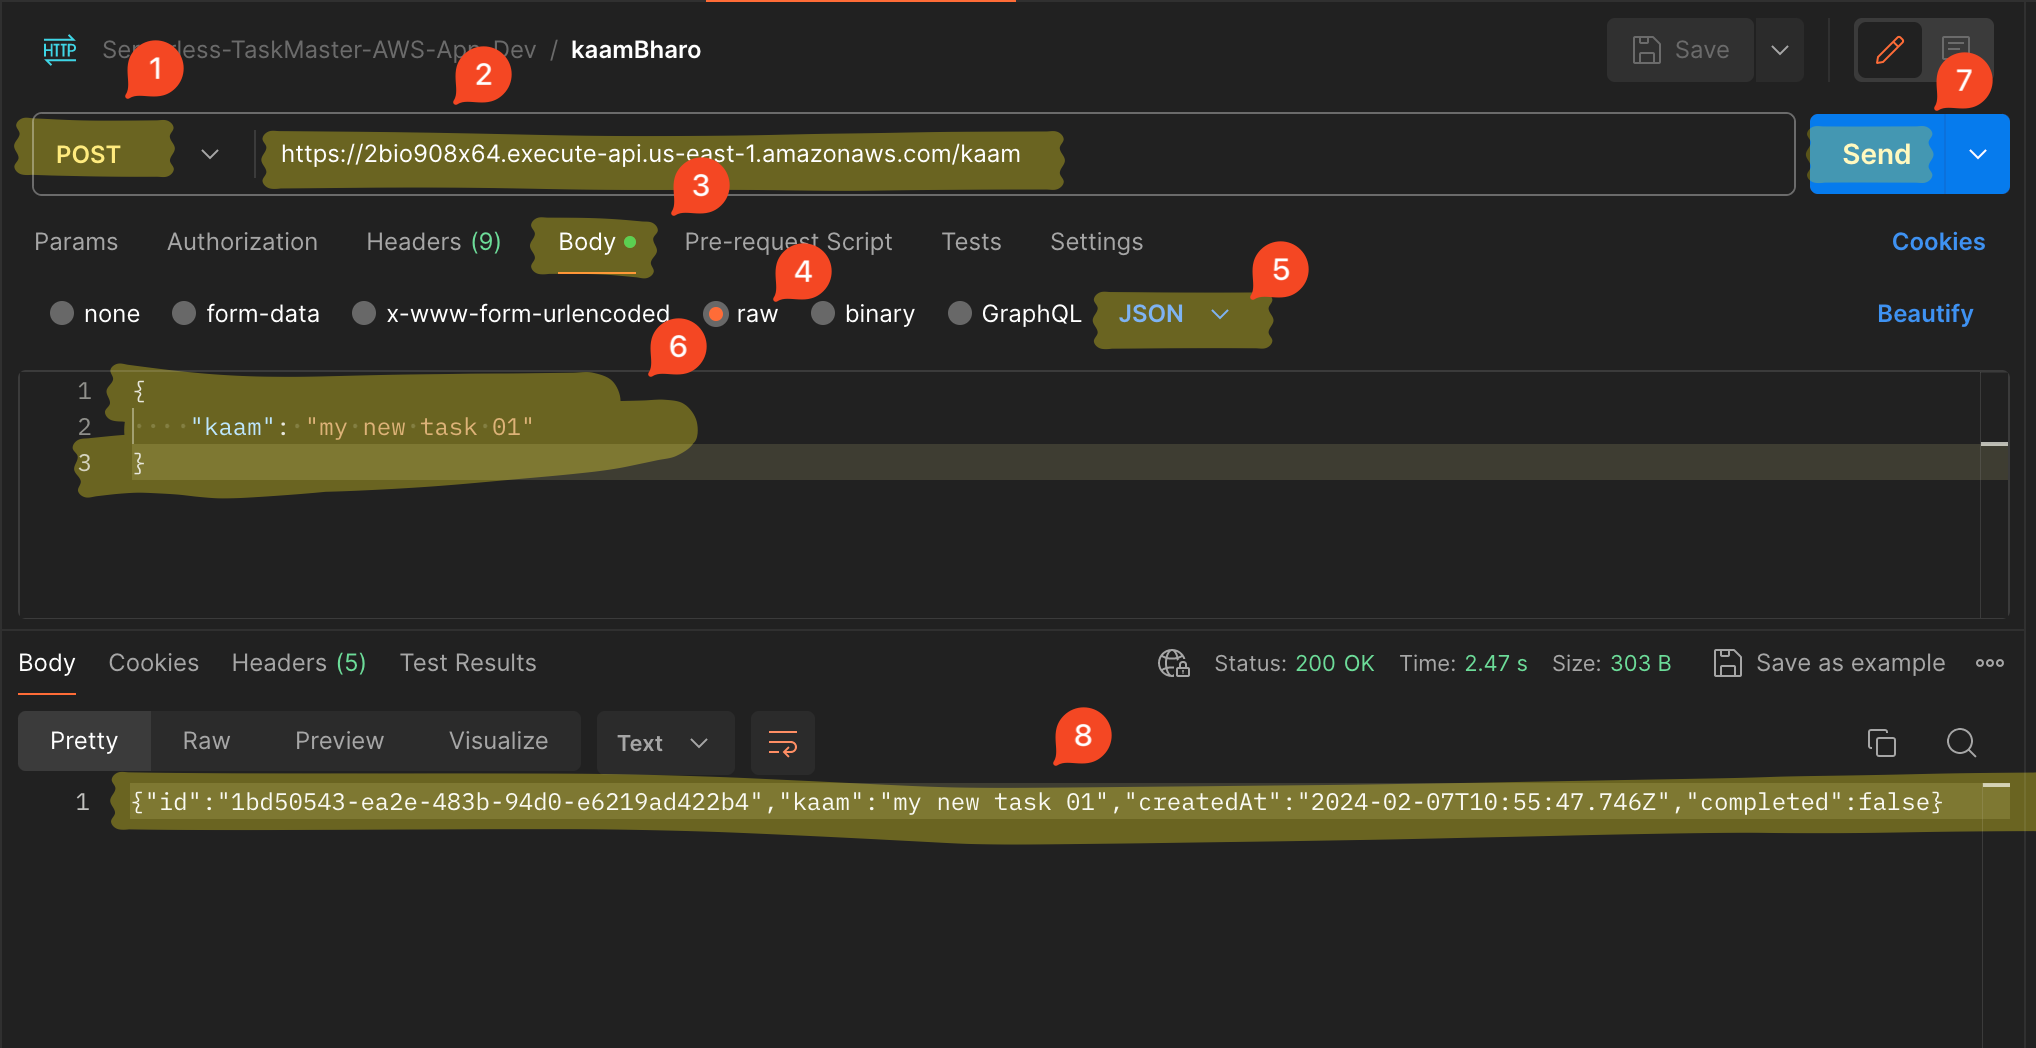
Like these you verify for every functions.
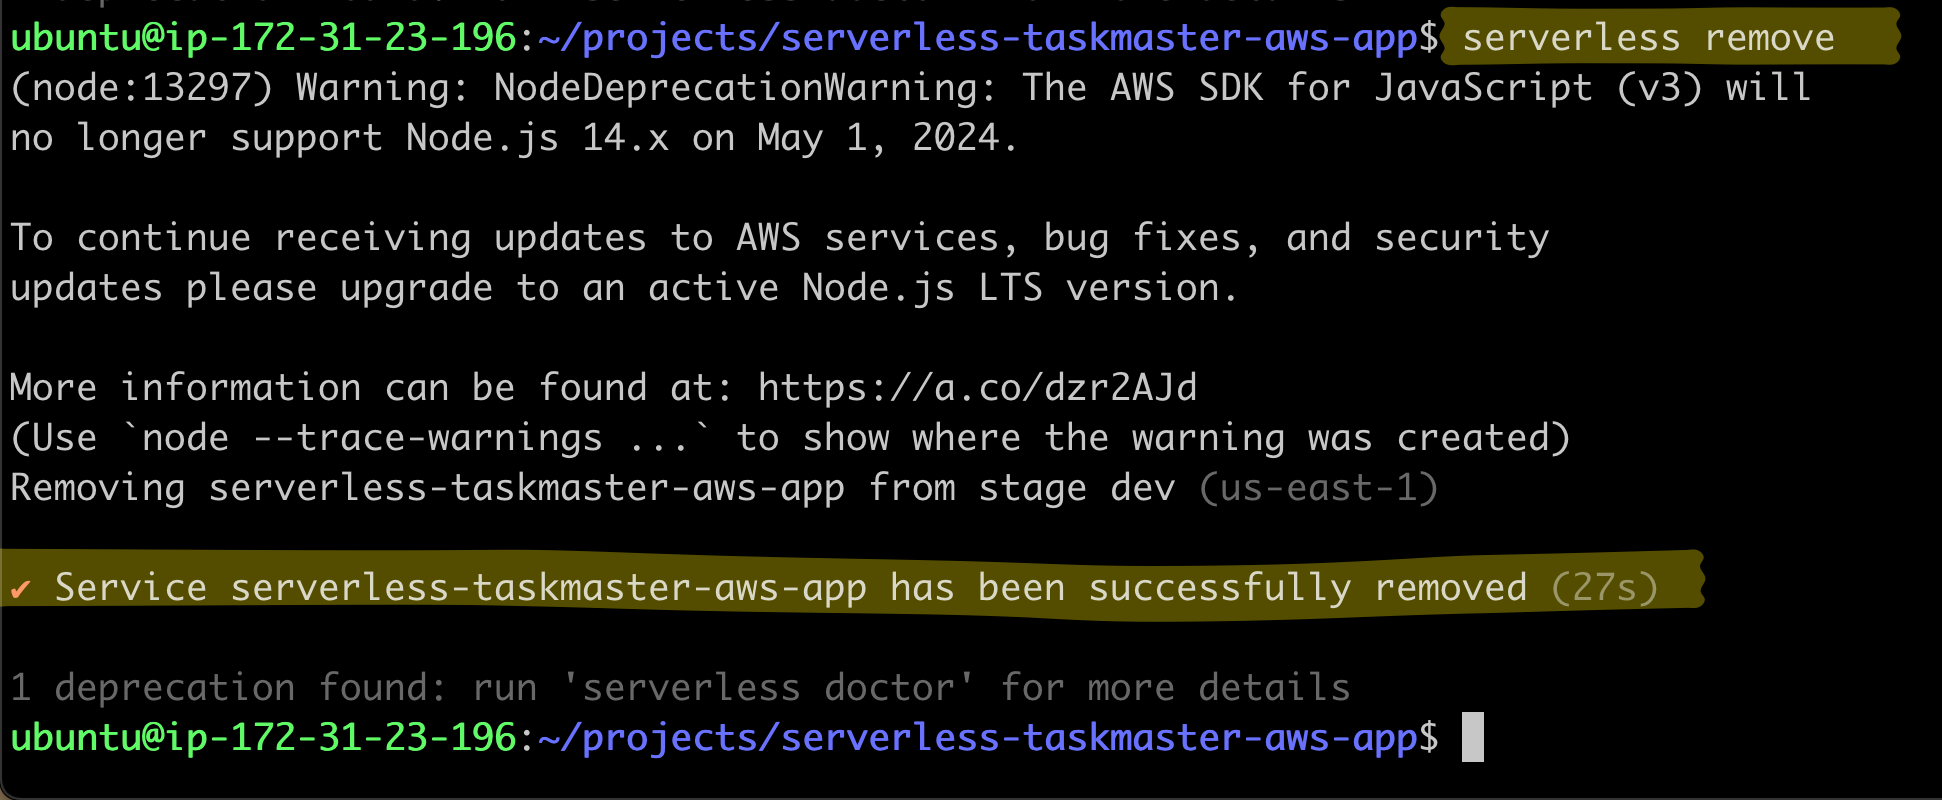
Delete Serverless Project
To destroy everything what you have created with serverless, you can run simple remove command:
serverless remove
Done! The project is completed. In the next blog, I will add CI/CD to this project.
If you liked my work, kindly like the blog and share it 🚀
Thank you!


